
Drywall Repair: Patching Holes Without Calling a Pro
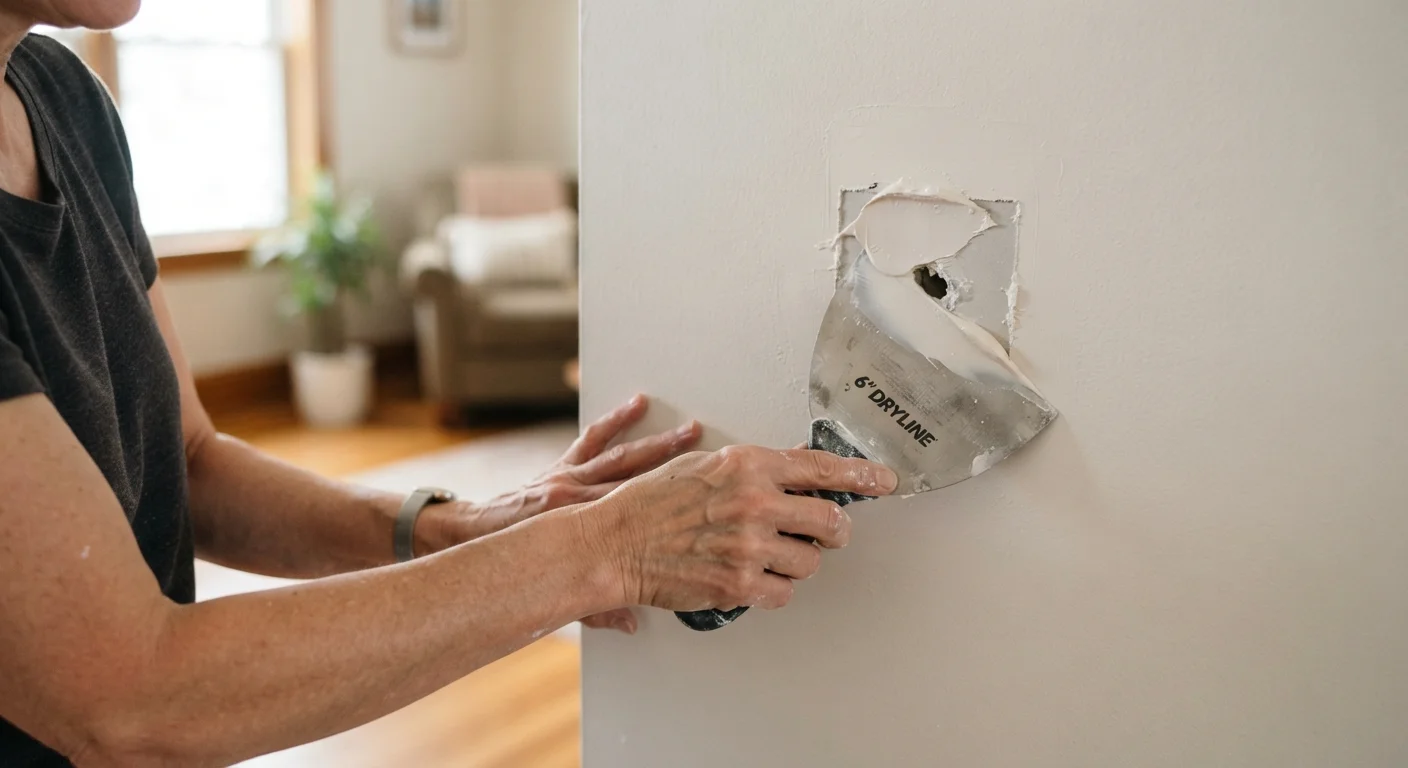
Photo credit: ResultsPoint.net | Find The Required Information
In this article
Learn how to fill small and medium drywall holes cleanly, from choosing the right compound to feathering a smooth finish that takes paint well.
Key Takeaways
- Most holes up to about six inches wide can be patched without professional help.
- Using the right type of compound for the hole size is the single most important choice.
- Thin, feathered coats dry better and sand smoother than one thick application.
- Priming before painting is essential for a patch that blends in invisibly.
- Larger holes or damage near electrical or plumbing lines should be evaluated by a licensed professional.
Why Drywall Patches Fail — and How to Avoid It
Most failed drywall patches share the same root cause: too much compound applied too fast. Thick coats trap moisture inside, leading to cracking, shrinking, and peeling. Understanding why the process requires multiple thin layers is not just technique — it is the difference between a patch that lasts and one you redo in six months.
The other common mistake is skipping primer. Paint applied directly over joint compound looks fine briefly, then shows a telltale dull spot where the compound absorbed the sheen unevenly. A quick coat of primer eliminates that problem entirely.
Mold or Water Damage Changes Everything
If the area around the hole shows discoloration, soft drywall, or a musty odor, stop and investigate the moisture source first. Patching over water-damaged drywall traps the problem inside the wall. Address the leak and any mold before making cosmetic repairs — and consult a professional if mold coverage is extensive.
For a broader picture of which home repairs genuinely suit a confident DIYer and which ones cross into professional territory, see our guide to drawing the line on home repairs. Drywall patching for small and medium holes sits comfortably in DIY territory — but knowing when to call a pro matters too.
Stop Before You Cut Into the Wall
Before sawing or cutting drywall to repair a larger hole, verify the area is free of electrical wiring, plumbing, or gas lines. If you are unsure, consult a licensed professional. Cutting into a live wire or pipe is a serious safety hazard that no cosmetic repair is worth risking.
What You Will Need
Gathering your materials before you start prevents mid-project trips to the hardware store — which usually happen right after your hands are coated in compound. The list is short and the supplies are widely available.
What you will need
One note on compound types: lightweight all-purpose compound (the blue or green lid tub) is the easiest to work with for most homeowners. Setting-type compounds (sold as powder you mix with water) harden faster and are stronger for deep fills, but they are less forgiving and cannot be re-wet once set.
Putty knife set (3-inch and 6–10-inch)
Used to apply, spread, and feather joint compound at different patch sizes.
Self-adhesive mesh patch
Bridges holes roughly half an inch to six inches wide, giving compound a surface to grip.
Setting-type joint compound
Hardens by chemical reaction rather than drying, making it stronger for filling deeper voids.
Sanding sponge
Smooths dried compound with less dust and better control than rigid sandpaper sheets.
Drywall primer
Seals the porous compound so topcoat paint absorbs evenly and the patch does not flash.
Step-by-Step: Patching the Hole
Follow these steps in order. Rushing the drying time between coats is the most common shortcut that causes visible failure later.
Assess and prepare the hole
Determine the hole's diameter. Nail pops and small dings under a quarter inch need only spackling paste or lightweight compound. Holes from a doorknob or anchor bolt — roughly half an inch to six inches — call for a mesh patch and all-purpose compound. Holes larger than six inches typically require a backing board or a cut-in drywall patch.
Remove any loose paper facing or crumbling edges around the hole with a putty knife. Wipe away dust with a dry cloth. A clean, stable edge helps compound adhere and dry without cracking.
Apply backing support for larger holes
For holes between half an inch and six inches, press a self-adhesive mesh patch firmly over the opening, centered so mesh covers the entire void with at least an inch of overlap on solid drywall on each side. Smooth the edges of the mesh flat with your fingers.
For holes larger than six inches, cut a piece of drywall slightly smaller than the opening, then attach a wooden furring strip or backing board inside the wall cavity to anchor the patch piece before applying compound.
Apply the first coat of compound
Load your knife with a modest amount of joint compound — about the size of a golf ball for a medium patch. Hold the knife at roughly a 30-degree angle and draw it firmly across the mesh or hole, pressing compound into and over the mesh. Use even, overlapping strokes moving in one direction.
Keep this first coat thin. Its job is to embed the mesh and fill the void, not to achieve a flush surface. Expect the mesh texture to remain partially visible. Allow to dry completely — typically four to eight hours depending on humidity and temperature.
Sand lightly and apply a second coat
Once fully dry, sand the first coat lightly with 150-grit sandpaper or a damp sanding sponge. You are not trying to flatten it completely — just knock down any ridges or tool marks. Wipe away dust with a barely damp cloth and let the surface dry.
Apply a second, wider coat, extending two to three inches beyond the first coat on all sides. Use your larger knife held at a lower angle to feather the edges outward. This coat should be noticeably thinner than the first.
Final coat, sanding, and priming
After the second coat dries fully, inspect the patch under raking light (a flashlight held at a low angle reveals imperfections other lighting misses). Apply a thin third coat if needed, feathering edges even wider. Once satisfied, sand smooth with 220-grit sandpaper, then wipe clean.
Apply a coat of drywall primer before painting. Unprimed compound is porous and will absorb paint unevenly, causing the patch to look dull or slightly different in sheen — a phenomenon called flashing. Primer seals the surface so your topcoat goes on uniformly.
Feathering Makes or Breaks the Finish
Feathering means gradually thinning the compound outward from the patch so there is no visible edge. Hold your knife at a low angle and sweep outward with light pressure. The wider your feathered area, the less sanding you will need and the more seamlessly the patch blends into surrounding drywall.
Once the patch is primed and painted, it should be indistinguishable from the surrounding wall under normal lighting. If you are also tackling other small gaps around trim, doors, or windows, our article on caulking and sealing gaps pairs well with this project.

Author
Home Editorial Team
Home Editorial Team is the collective byline for our editorial team and contributor network. Articles published under this byline or an editorial pen name are researched, written, and reviewed according to our editorial standards for clarity, consistency, and independence before publication.
View all articles →