
Small Bathroom, Real Results: Renovation Strategies That Maximize Tight Spaces
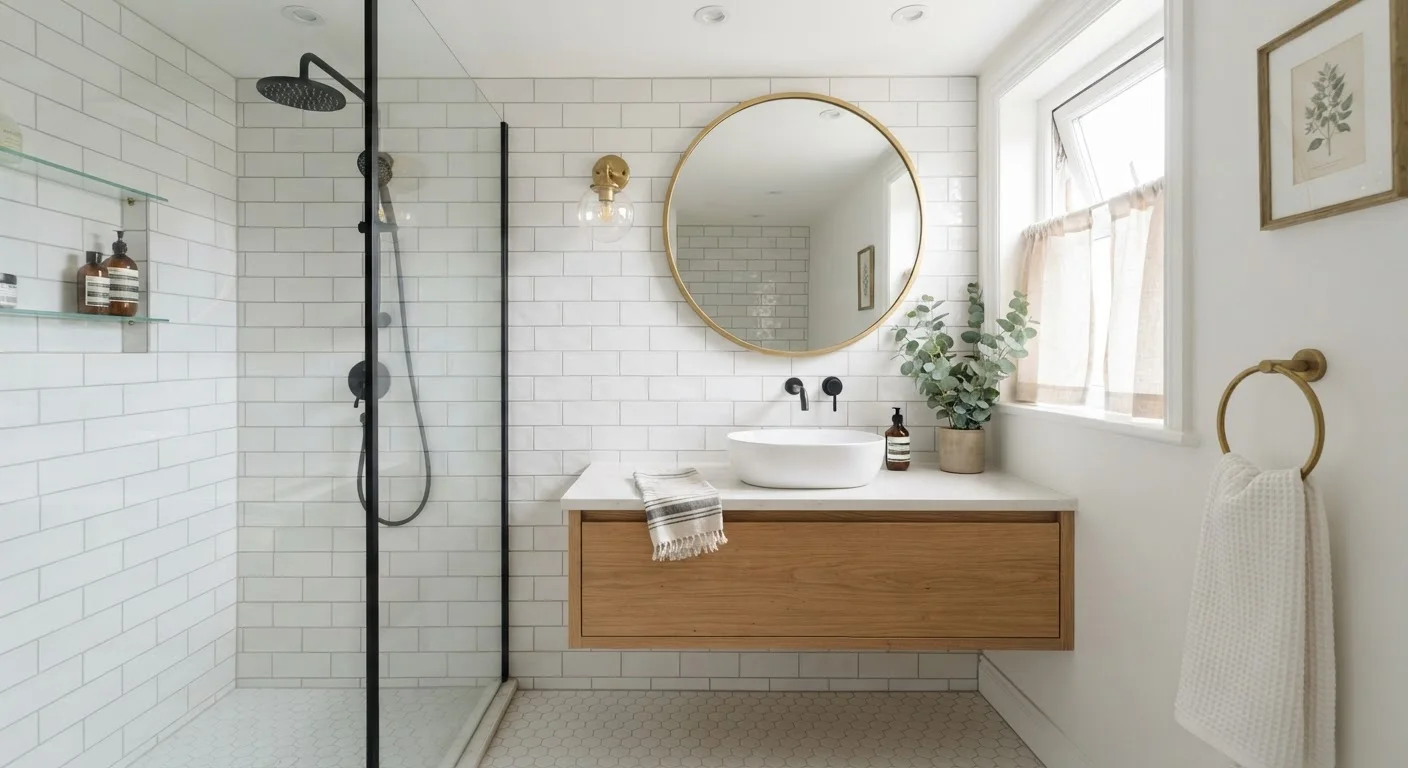
Photo credit: ResultsPoint.net | Find The Required Information
Layout choices, fixture sizing, lighting, and storage all interact differently in a small bathroom. Here's how experienced renovators approach the constraints.
Key Takeaways
- Fixture size and placement have more impact on usability than nearly any other small-bathroom decision.
- Vertical space is consistently underused — wall-mounted storage and tall mirrors add function without shrinking the floor.
- A continuous tile surface and consistent color palette can make a small bathroom feel significantly larger.
- Good lighting design eliminates the cramped feeling that even well-laid-out small bathrooms can suffer from.
- Permits and professional trades are often required for plumbing and electrical work — always verify local requirements.
Why Small Bathrooms Need a Different Strategy
A small bathroom isn't simply a big bathroom with less room — it operates by different rules. Decisions that work fine in a generous space (a double vanity, a freestanding tub, decorative shelving on every wall) actively work against you when square footage is tight. What experienced renovators understand is that constraint forces clarity: every choice has to earn its place.
Before picking a single tile or fixture, it's worth doing a thorough assessment of what you're working with. The room-by-room assessment checklist can help you catch moisture issues, wiring concerns, and structural surprises before they derail your project mid-stream. Similarly, if you're thinking about ROI, understanding the difference between maintaining value and increasing it will help you prioritize wisely. The strategies below address the specific pressure points that make small bathrooms challenging — and show how experienced renovators work with the constraints rather than against them.
Right-size every fixture before you fall in love with it
Standard vanities, toilets, and tubs are designed for average-sized bathrooms. In a small space, they crowd clearances, block sightlines, and make the room feel stuffed. Before committing to any fixture, measure carefully against your floor plan.
A compact toilet — typically 25 to 27 inches from tank to bowl tip rather than the standard 28 to 30 — can free up meaningful floor space without sacrificing comfort. A 24-inch vanity often serves a single-user bathroom just as well as a 36-inch model. If a tub is not essential, a walk-in shower with a frameless glass panel keeps the eye moving and avoids the visual barrier that a shower curtain or thick frame creates.
Measure every fixture against your floor plan before committing — standard sizing routinely overwhelms small bathrooms.
Mount things on walls to reclaim the floor
Floor-mounted fixtures and freestanding storage units eat into the most psychologically important real estate in a small bathroom: the visible floor. The more floor you can see, the larger the room reads.
Wall-hung vanities — those mounted directly to the wall with no legs or cabinet base touching the floor — create a visual gap underneath that stretches the room. Floating shelves, recessed medicine cabinets, and wall-mounted toilet paper holders all move storage upward without adding bulk. Where wall anchoring requires hitting studs or adding blocking behind drywall, plan for that during the rough-in phase, not as an afterthought.
Visible floor space makes a room read larger — wall-mounted fixtures are the most reliable way to expose it.
Use tile continuously to eliminate visual interruptions
Grout lines, transitions between materials, and abrupt color changes all act as visual stops — they break the eye's movement and make a space feel chopped up. In a small bathroom, fewer transitions read as more space.
Running the same tile from the floor up the walls — a technique called a wet-wall or waterfall tile application — is a widely used approach in compact bathrooms for exactly this reason. Large-format tiles (12×24 inches or bigger) reduce the number of grout lines across a surface, which further simplifies the visual field. Matching or toning grout to the tile color amplifies the effect. None of this requires expensive materials; the layout and consistency do the work.
Continuous tile from floor to wall, with minimal grout contrast, reduces visual clutter and expands perceived space.
Design lighting in layers, not just overhead
A single overhead light is the default in many small bathrooms — and one of the most common reasons they feel dim and cramped even after a renovation. Overhead-only lighting casts shadows on faces at the mirror and flattens the depth of the room.
A more effective approach combines ambient lighting (general overhead illumination), task lighting (fixtures flanking or above the mirror at face height), and accent lighting if the layout allows. Sconces positioned on either side of the mirror at approximately eye level provide the most flattering and functional task light. Recessed lighting on a dimmer switch gives flexibility. Because bathroom lighting involves electrical work near water, consult a licensed electrician and verify that any fixtures are rated for wet or damp locations per local code.
Layered lighting — ambient plus face-level task lights — eliminates shadows and makes small bathrooms feel open.
Make storage functional and hidden where possible
Open shelving looks clean in design photography; in a lived-in small bathroom, it tends to accumulate visual clutter quickly. Recessed niches built into wall cavities between studs — in the shower surround or beside the vanity — provide storage without projecting into the room at all.
A recessed medicine cabinet serves a similar function at the vanity: it replaces a flat mirror with a mirrored cabinet that adds depth and storage simultaneously. If your walls don't allow recessing (concrete or tiled surfaces already in place, for instance), choose closed-door storage over open shelves. The goal is a surface that reads calm and uncluttered, which requires that most daily-use items live behind a door or inside a drawer.
Recessed storage built into wall cavities adds capacity without consuming any floor or wall projection.
Prioritize the mirror over almost everything else
A large mirror — ideally spanning most of the vanity wall — is one of the highest-impact, most cost-effective moves in a small bathroom. Mirrors bounce light, reflect the opposite wall, and create the perception of depth that the room physically lacks.
A common mistake is choosing a mirror sized to match the vanity cabinet below rather than filling the available wall space. A mirror that runs from the countertop to near the ceiling, or spans wall-to-wall, reads very differently than one that matches cabinet width. Frameless or thin-framed mirrors maximize the reflective surface. If the mirror doubles as a medicine cabinet, you get the storage benefit at the same time.
A mirror sized to fill the wall — not just the vanity — is one of the most effective visual expansions available.
Putting It All Together
Small-bathroom renovations reward deliberate planning more than almost any other home project. Because every inch is visible and in use, poor decisions compound quickly — but so do good ones. A well-chosen fixture, a smarter tile layout, or a single recessed niche can shift the entire feel of the room.
Sequence Trades Before Ordering Fixtures
In a small bathroom, the order of work matters as much as the work itself. Rough plumbing and electrical should be inspected and closed in before tile goes down, and tile should be set before fixtures are installed. Ordering fixtures before your rough-in dimensions are confirmed is a common source of costly returns. Give yourself a buffer between trade scheduling and material delivery.
If budget is a factor — and it usually is — the budget-focused renovation strategies worth prioritizing are those that affect perceived space first: lighting, mirror size, and surface continuity tend to deliver the most visible return per dollar spent. For a broader look at how bathroom work fits into a larger renovation plan, the full renovation overview covers sequencing, contractor coordination, and managing surprises from start to finish.
This article is for general informational purposes only. Plumbing, electrical, and structural work may require permits and licensed contractors. Always verify local building codes and requirements before beginning any renovation project.

Author
Home Editorial Team
Home Editorial Team is the collective byline for our editorial team and contributor network. Articles published under this byline or an editorial pen name are researched, written, and reviewed according to our editorial standards for clarity, consistency, and independence before publication.
View all articles →