
Composting at Home: Turning Kitchen Scraps Into Garden Gold
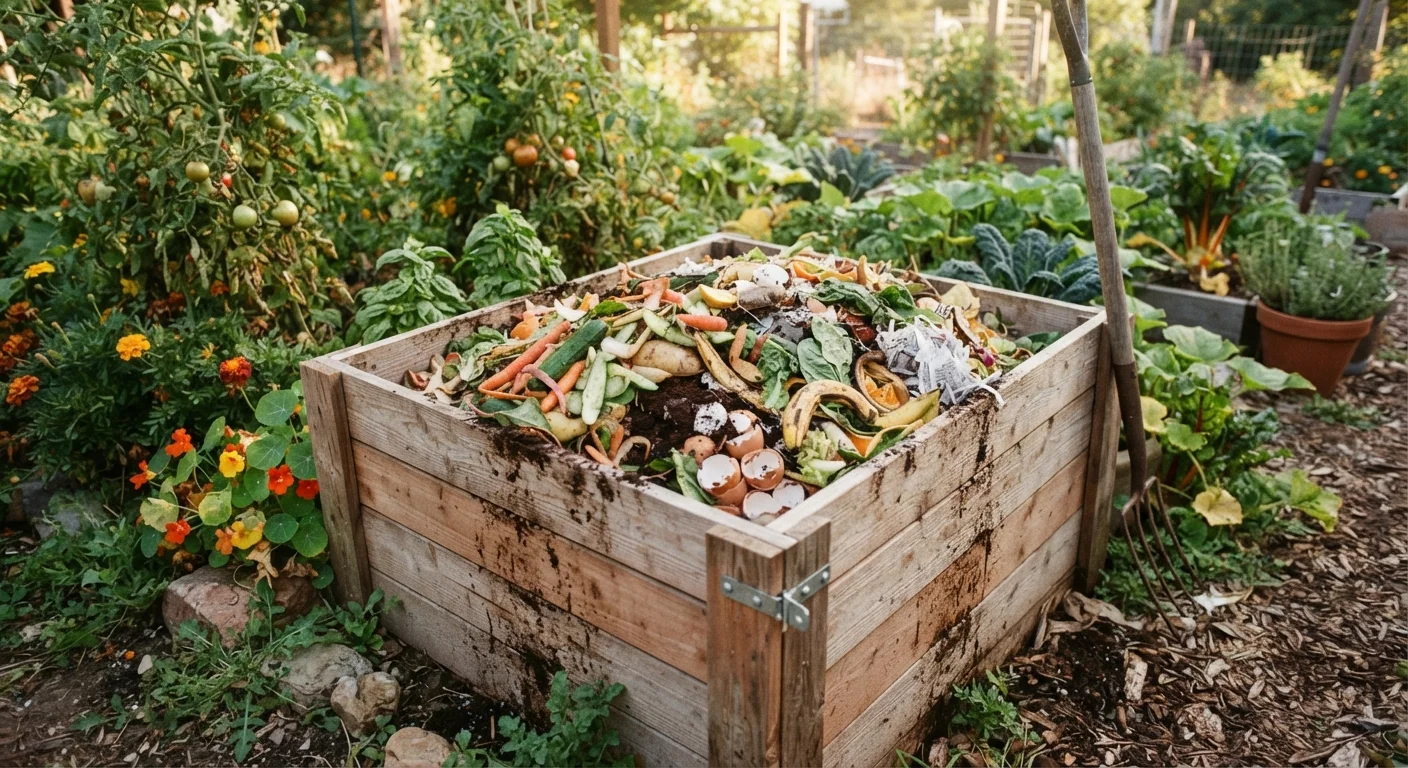
Photo credit: ResultsPoint.net | Find The Required Information
In this article
Learn how home composting works, what to include, what to leave out, and how finished compost benefits your soil and plants.
Key Takeaways
- Composting requires a balance of nitrogen-rich 'greens' and carbon-rich 'browns' to work effectively.
- Most kitchen scraps and yard waste can be composted; meat, dairy, and oily foods should be left out.
- Finished compost improves soil structure, water retention, and nutrient availability for plants.
- A healthy compost pile needs regular turning and adequate moisture to decompose properly.
- You can compost in a small bin even without a yard, making it accessible for most households.
Why Composting Is Worth the Effort
Composting is one of the most practical habits a home gardener can develop. It diverts kitchen and yard waste from landfills while producing something genuinely valuable: a free, nutrient-dense soil amendment that improves almost any growing environment. Finished compost feeds soil biology, improves drainage in heavy clay soils, and increases water retention in sandy soils — benefits that go well beyond what most packaged fertilizers can offer on their own. To understand how compost fits into the bigger picture of soil health, see our guide to garden soil types.
For new growers, composting also builds a useful intuition for how organic matter cycles through a garden ecosystem. That understanding pays off in everything from vegetable growing to container care. If you're building a garden from scratch, our beginner's guide to starting a vegetable garden explains how compost fits into your setup from day one.
What you will need
What Goes In — and What Stays Out
One of the most common composting mistakes is treating the pile as a general waste bin. Knowing what to include keeps your pile healthy and odor-free.
- Include: raw fruit and vegetable scraps, coffee grounds, tea leaves, eggshells, grass clippings, dry leaves, shredded paper and cardboard, plant trimmings, and garden soil
- Leave out: meat, fish, dairy, oily or cooked foods, pet waste, diseased plants, and weeds that have gone to seed
Never Compost These Items
Meat, fish, bones, dairy products, and cooked foods with oils or sauces should never go into a home compost pile. These attract pests, create odor problems, and can introduce pathogens. Pet waste and diseased plants should also stay out, as home compost piles rarely reach temperatures high enough to neutralize the risks they carry.
There's also a lot of conflicting advice online about things like coffee grounds and eggshells. Our article on common garden myths separates fact from folklore on several popular composting claims.
Step-by-Step: Building and Managing Your Compost Pile
Follow these steps to set up and maintain a compost system that produces usable finished material in a reasonable timeframe.
Compost bin or tumbler
Contains the composting materials, retains heat, and keeps pests out.
Countertop scrap collector
Collects kitchen scraps conveniently before transferring them to the main bin.
Garden fork or pitchfork
Used to turn and aerate the pile, introducing oxygen to speed decomposition.
Compost thermometer
Measures internal pile temperature to confirm active decomposition is occurring.
Watering can or garden hose
Adds moisture to a dry pile to maintain the right decomposition conditions.
Choose your composting setup
Pick a spot in your yard that gets partial sun and is reasonably close to both the kitchen and your garden beds. A location that's too far away makes the task feel like a chore. You can use an open pile, a DIY wooden bin made from pallets, or a purchased enclosed bin or tumbler. Tumblers are a good choice if you're concerned about pests or have limited space. For apartment dwellers, an indoor worm bin (called vermicomposting) is a practical alternative — worms process food scraps into rich castings without requiring outdoor space.
Understand greens vs. browns
Successful composting depends on balancing two types of materials. Greens are nitrogen-rich and include vegetable and fruit scraps, coffee grounds and filters, tea bags, fresh grass clippings, and plant trimmings. Browns are carbon-rich and include dry leaves, cardboard, newspaper, paper bags, straw, and wood chips. A rough ratio of 2–3 parts browns to 1 part greens by volume keeps the pile active without creating odors. Too many greens makes a slimy, smelly pile; too many browns slows decomposition to a crawl.
Start your pile with a base layer
Begin with a 4–6 inch layer of coarse browns — wood chips, straw, or torn cardboard — directly on the ground. This layer allows airflow from below and helps with drainage. Follow with a layer of greens, then alternate from there. If your pile is starting from scratch in fall, a big batch of fallen leaves makes an ideal foundation and can be stockpiled in bags to use as needed throughout the year.
Add kitchen and yard scraps consistently
Collect vegetable peels, fruit cores, coffee grounds, crushed eggshells, and plant-based food scraps in a countertop container. Empty it into your bin every day or two and cover the fresh greens with a scoop of browns. Yard additions like grass clippings, spent garden plants, and pruning trimmings can go in as well. Avoid adding weeds that have gone to seed, as home compost piles may not get hot enough to kill them.
Turn the pile regularly
Oxygen is essential for the microbes doing the decomposition work. Use a garden fork to turn the pile every 1–2 weeks, pulling material from the outside into the center. This is the single most effective way to speed up composting. A well-managed pile that's regularly turned can produce finished compost in as little as 6–8 weeks. A pile that is never turned can take 6–12 months or longer.
Recognize and use finished compost
Finished compost looks dark brown, crumbles easily, smells like fresh earth, and no longer resembles its original ingredients. It typically takes 2–6 months depending on conditions and how actively you manage the pile. To use it, spread a 1–2 inch layer over garden beds and work it into the top few inches of soil, or use it as a top dressing around established plants. It can also be mixed into potting soil for containers.
Speed Up Decomposition Naturally
Chop or shred materials before adding them to your pile. Smaller pieces give microbes more surface area to work on, which can cut your composting time significantly. Coffee grounds, which are nitrogen-rich, are particularly effective activators when mixed in regularly.
Putting Finished Compost to Work in Your Garden
Compost improves soil structure over time in ways that synthetic inputs generally cannot replicate on their own. Mixed into garden beds, it introduces beneficial microorganisms and organic matter that help plants absorb nutrients more efficiently. It also acts as a slow-release feed, reducing the need for supplemental fertilizers. For a fuller comparison of how organic amendments like compost stack up against synthetic options, see our breakdown of organic vs. synthetic fertilizers.
If you're gardening in containers or a small outdoor space, compost can be mixed directly into potting medium to extend its life and boost nutrition — a useful technique covered in our container gardening guide. Even a small amount of finished compost added seasonally makes a measurable difference in how container plants perform.
Watch Your Moisture Levels
A pile that's too wet will turn slimy and smell like ammonia or rotten eggs — a sign the pile has gone anaerobic (oxygen-deprived). A pile that's too dry simply won't decompose. Aim for the moisture level of a wrung-out sponge. If it's soggy, add dry browns like cardboard or straw; if it's dusty, mist it with water and mix.

Author
Home Editorial Team
Home Editorial Team is the collective byline for our editorial team and contributor network. Articles published under this byline or an editorial pen name are researched, written, and reviewed according to our editorial standards for clarity, consistency, and independence before publication.
View all articles →